

Newsletter Sign up using Automated Workflows
On this page:
Contact Form
To enable newsletter sign up with an automated workflow, you must first set up a contact form that your website visitors can use to give you their sign up information.
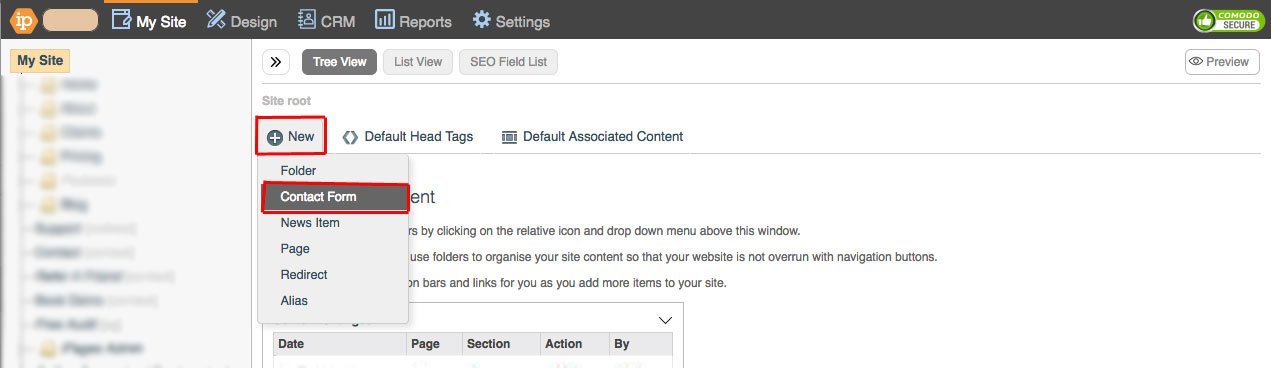
Go to My Site > Pages.

Go to +New > Contact Form.
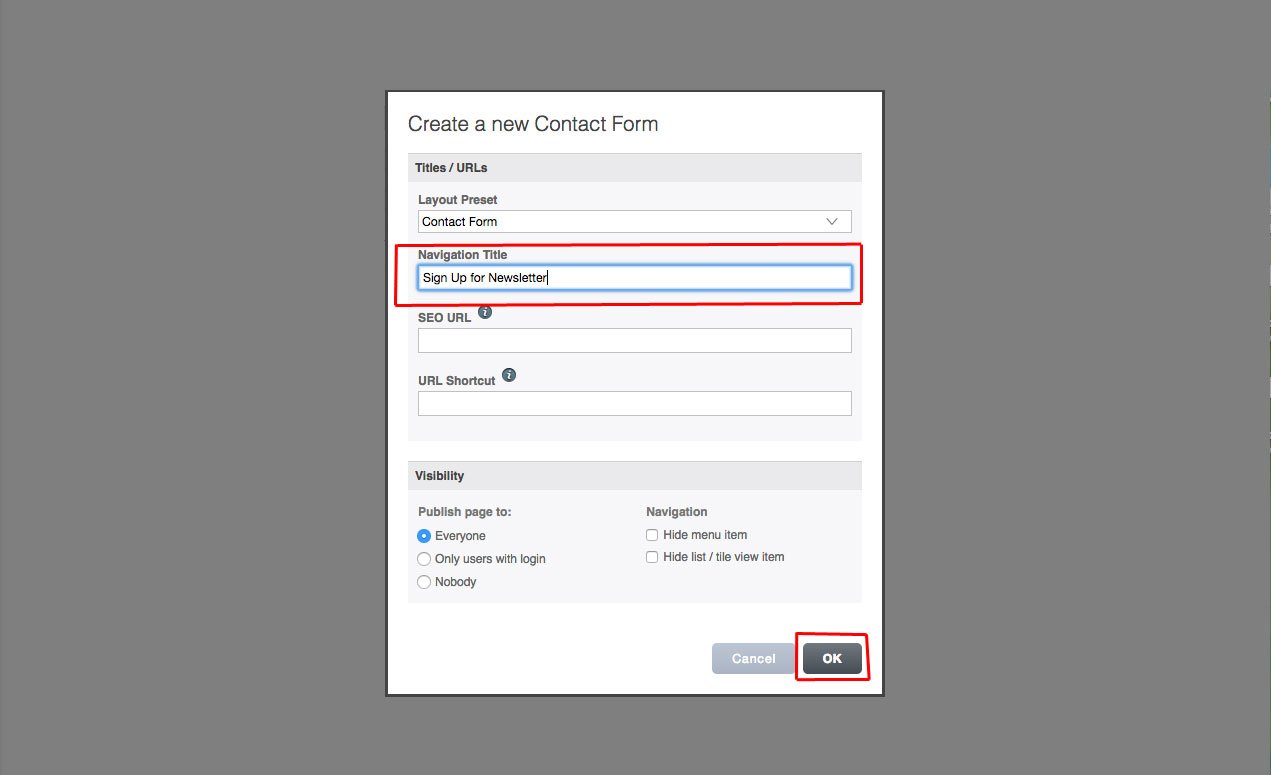
Type in a Navigation Title and click OK.
Fill out your Description, Display Message and Or/Redirect to.
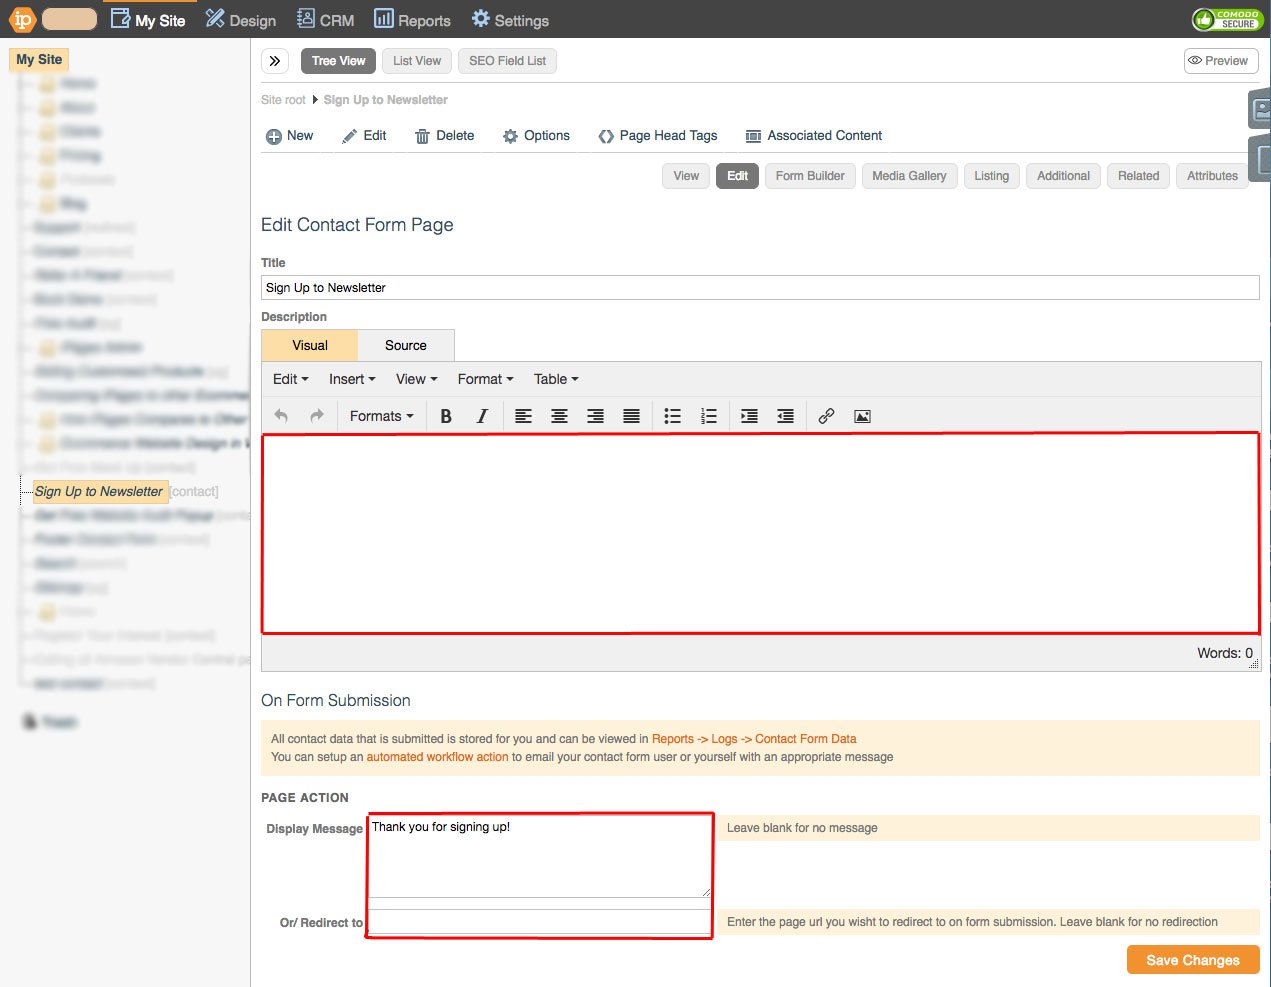
To find out more information about this, Click here.
Save Changes.
Go to Edit > Form Builder.
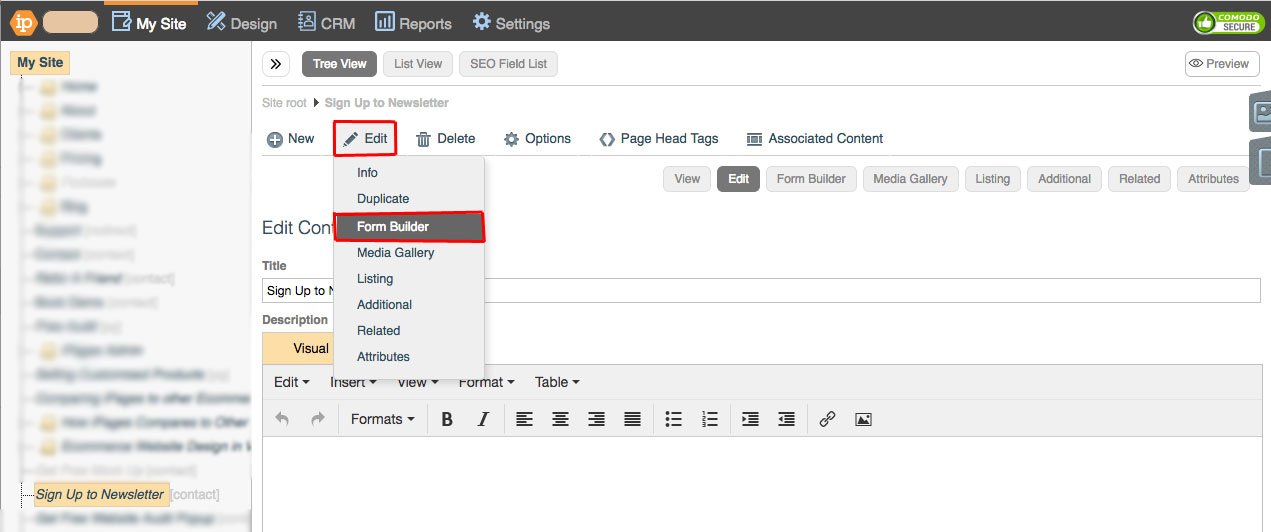
Build the form.
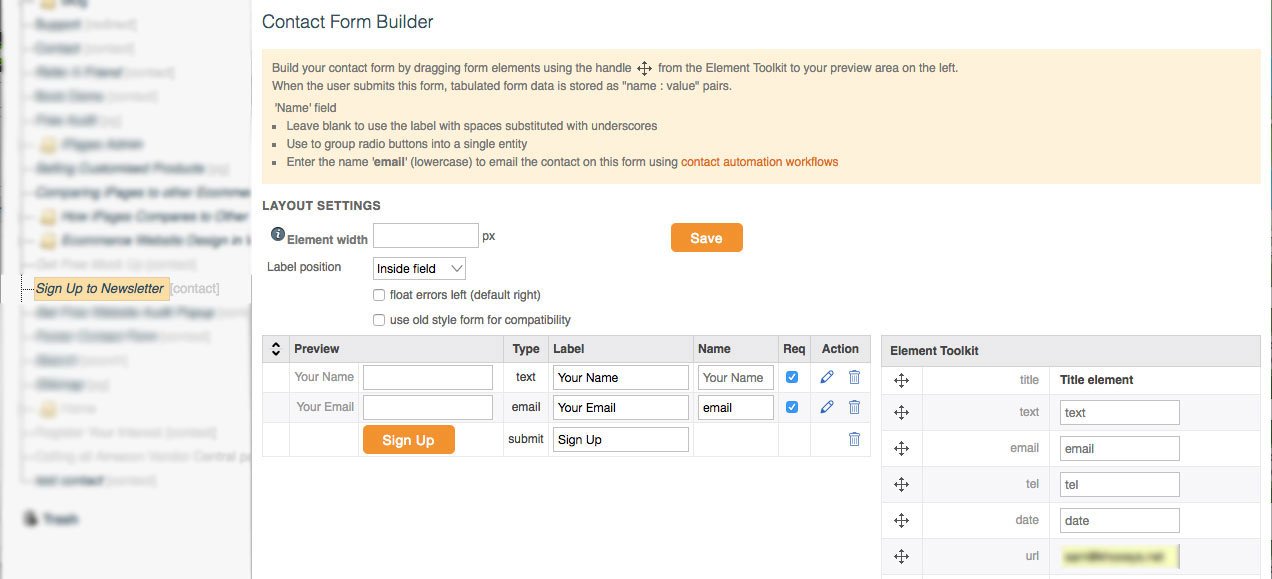
To find out more information about this, Click here.
Click Save.
Mailing List
Before you can send your newsletter, you will need a mailing list to send it to.
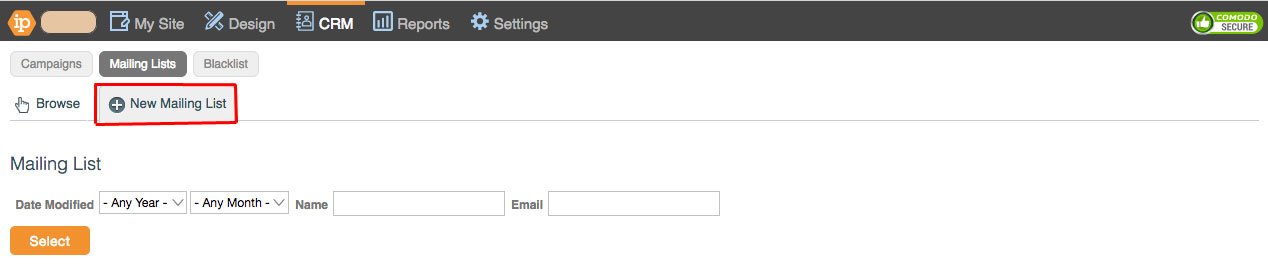
Go to CRM > eCampaigns > Mailing List.

Click +New Mailing List.
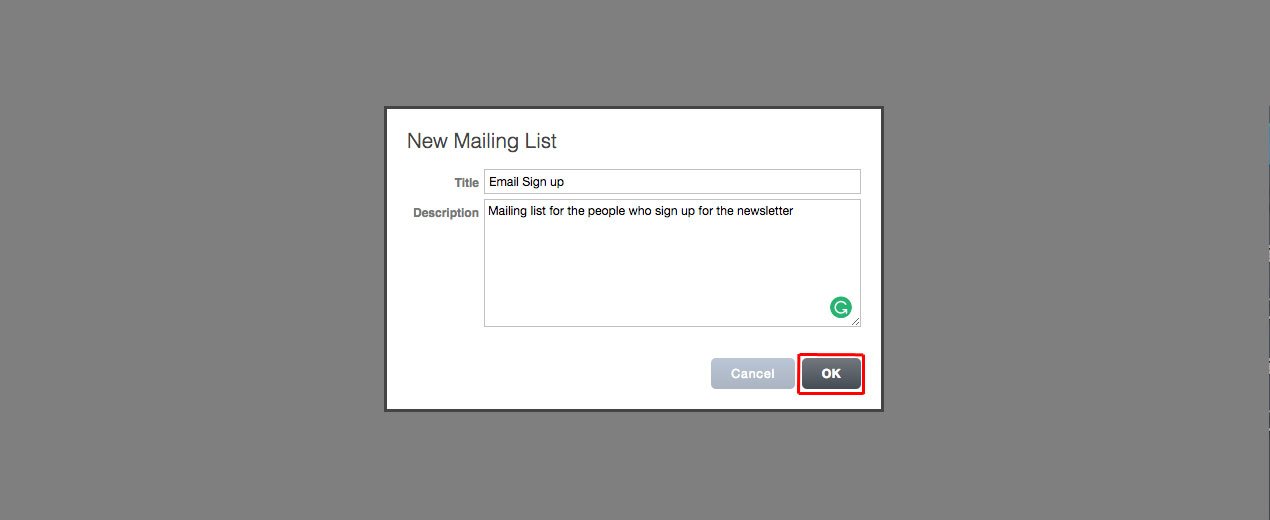
Fill out Title and Description and then click OK.
Automation workflows
After you've built your contact form and your mailing list, it's time to connect them;
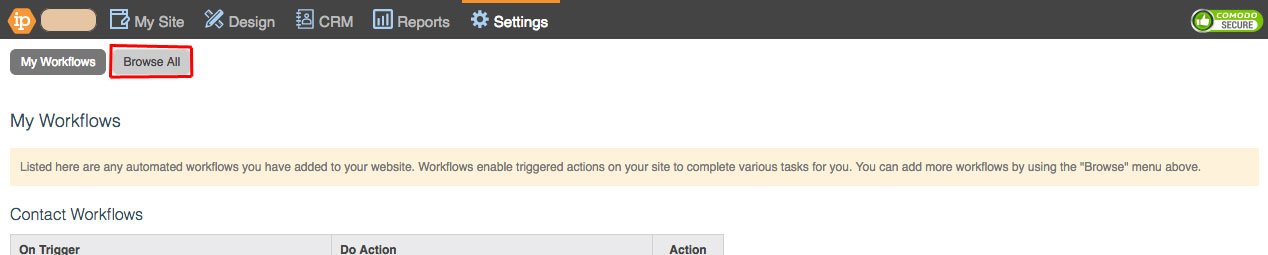
Go to Settings > Automation Workflows.
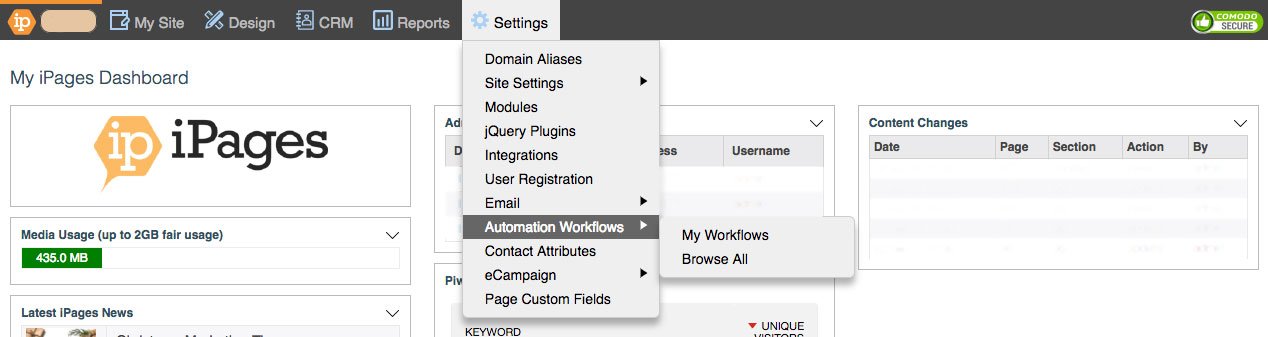
Click Browse All.
Click +Add on Email contact using their submitted email address.

Fill out the workflow to inform the contact that they've been added to your mailing list.
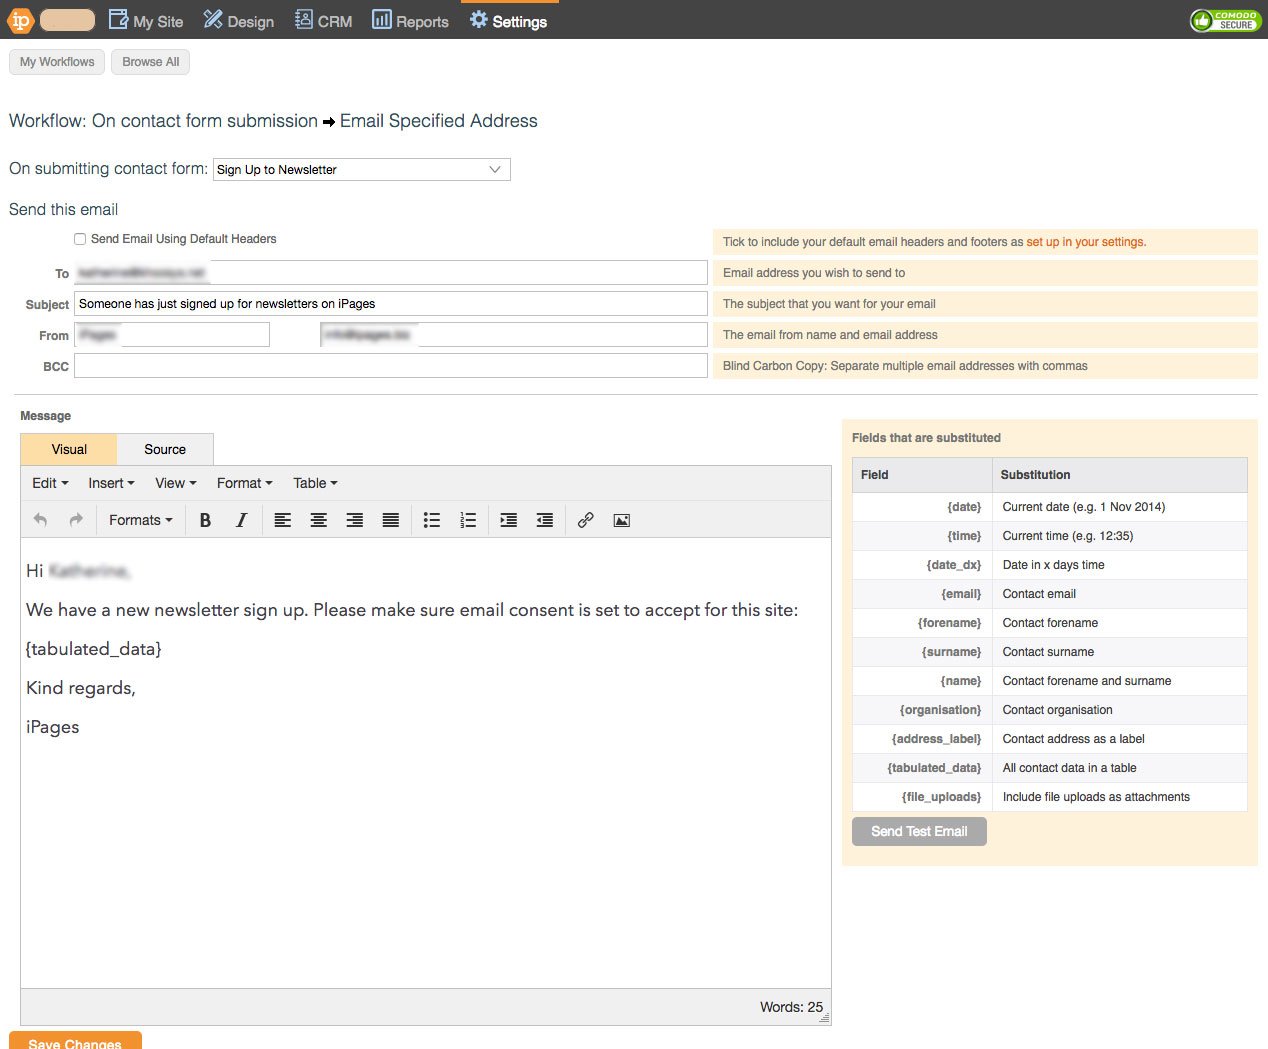
Save Changes.
Click Browse All.
Click +Add on Add contact to an email list

Choose your contact form from the first drop-down.
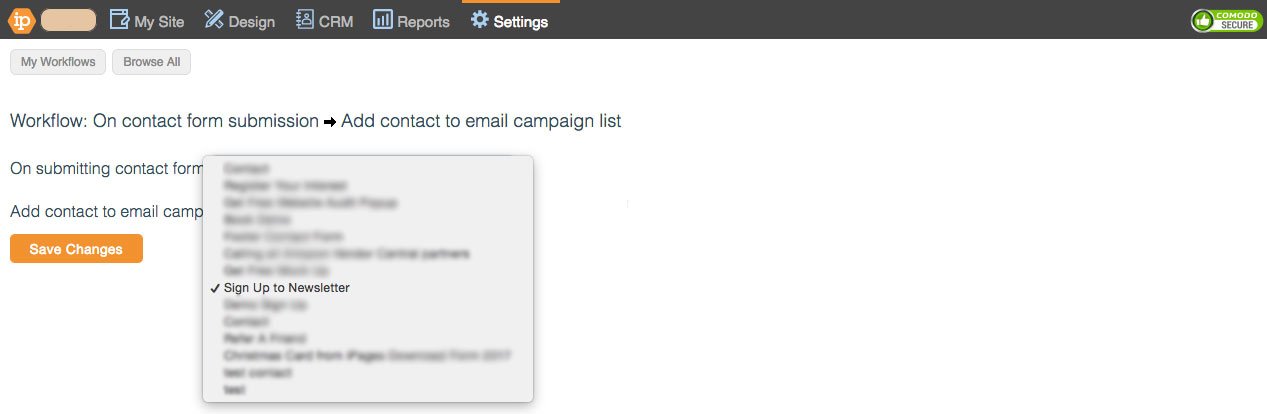
Choose your mailing list from the second drop-down.

Save Changes.