Adding News items
On this page:
Blog posts are a great way to promote discussion with your customers, sharing your expertise, announcements and any other information you may wish to share. It's also good for your search engine rankings.
Creating a blog post
Go to My Site > Pages.

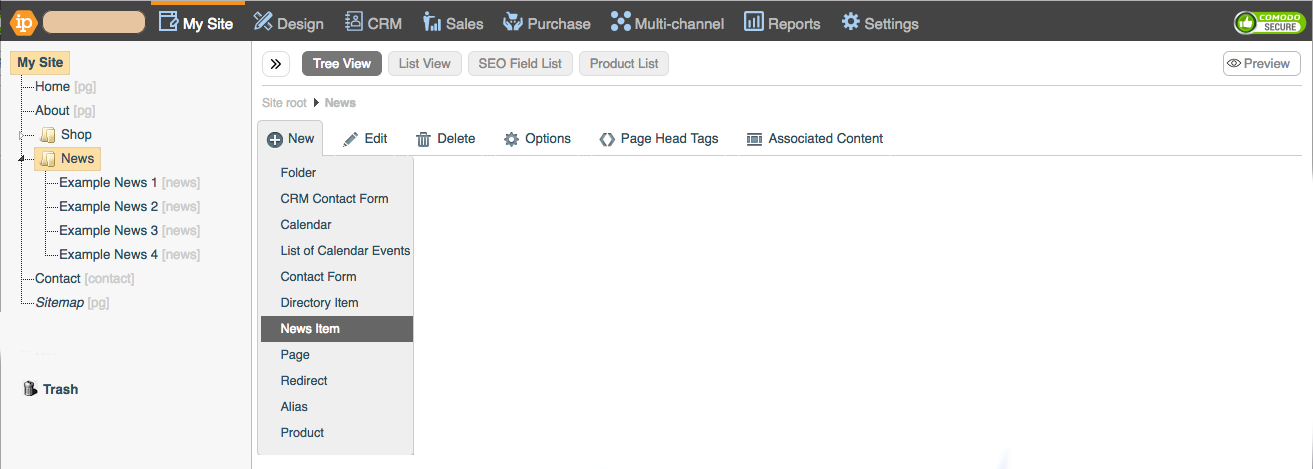
Navigate to your blog folder. This may also be called News.
New > News Item.
When the dialogue appears, give your news item a title.
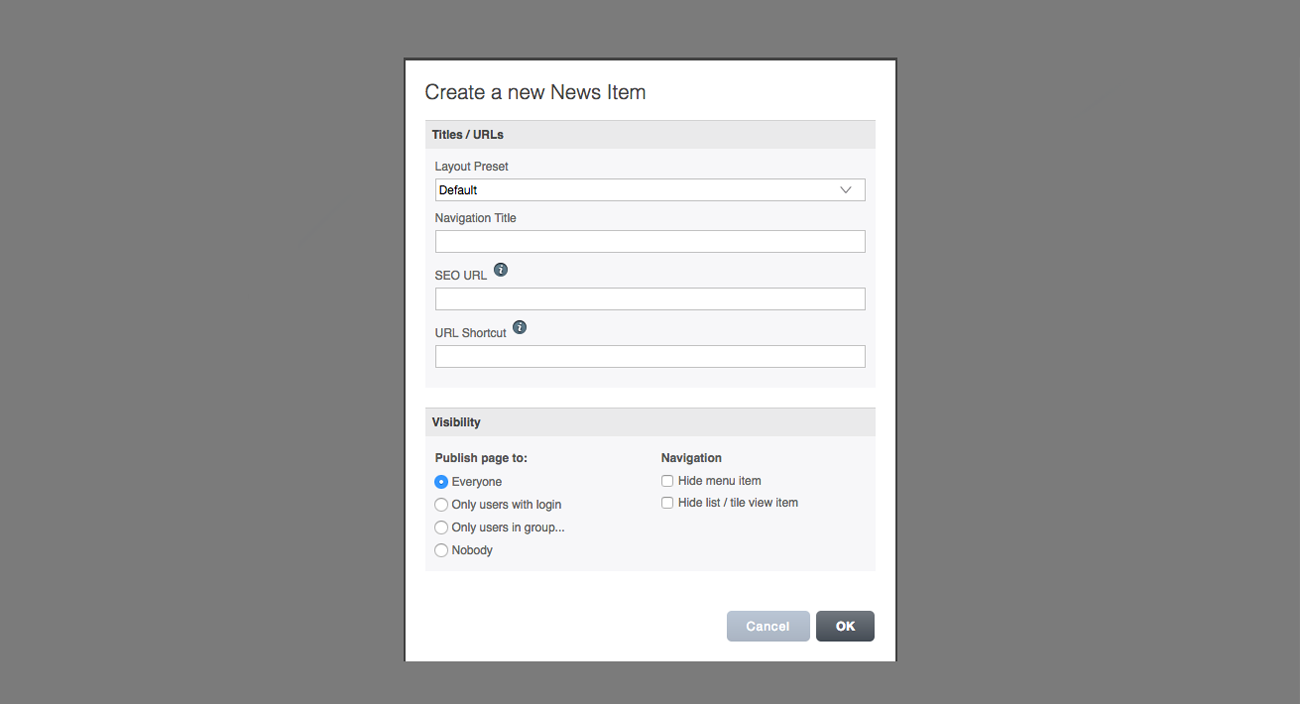
Click OK.
Fill in the appropriate fields.
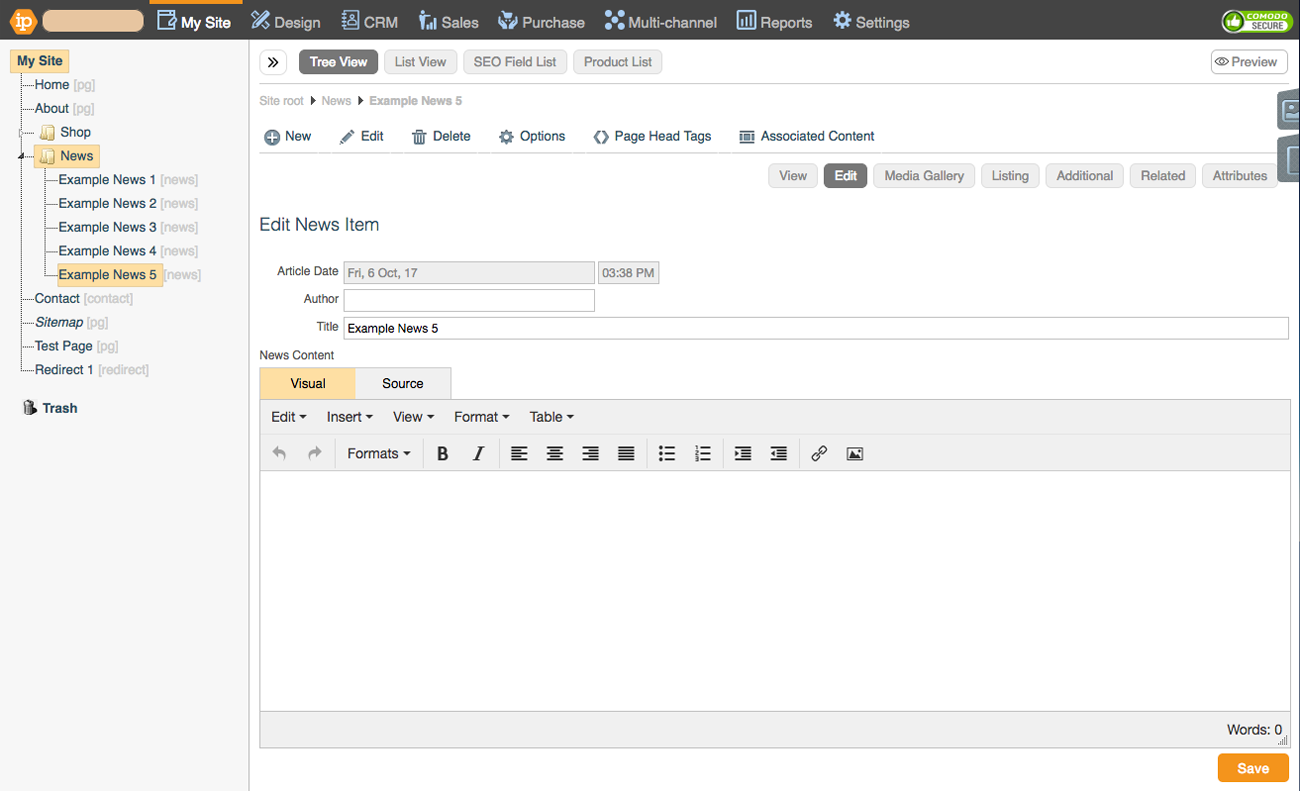
Article Date
Choose the date and time you wish to correspond with your new article.
Author
Enter the name of the author of your news item here.
Title
The title is automatically generated from the title you gave earlier. You can change this if you wish.
News Content
In the WYSIWYG editor you can add in your desired content. Just use the icon menu to format your content.
Adding an image to a blog post
Information: If you're familiar with the media gallery already then you don't need to continue, the same concept applies.
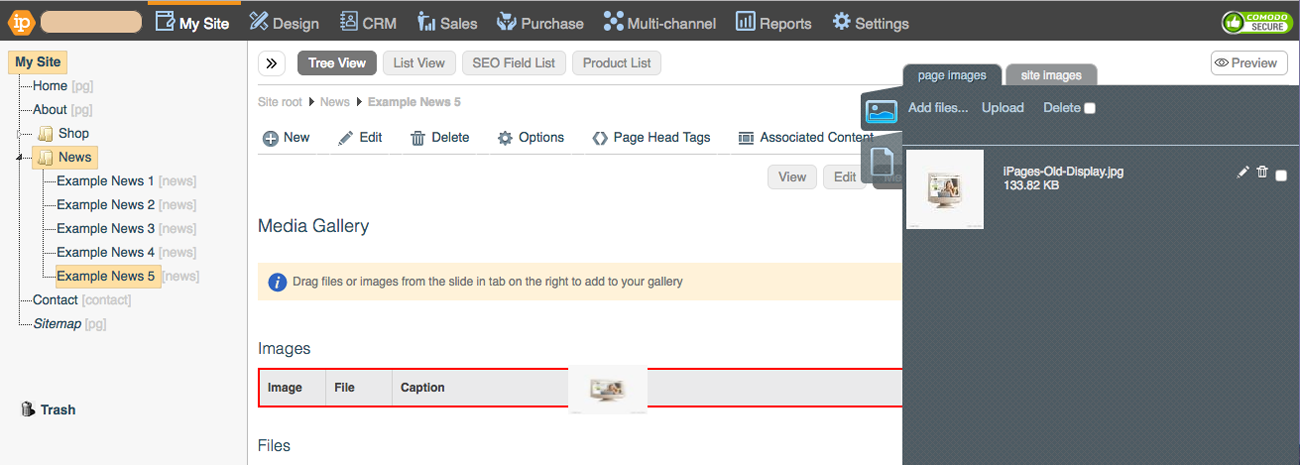
Within your news item, go to Edit > Media Gallery.

Open the image menu by clicking on the image icon.

Upload your images by dragging them in, or clicking Add files.
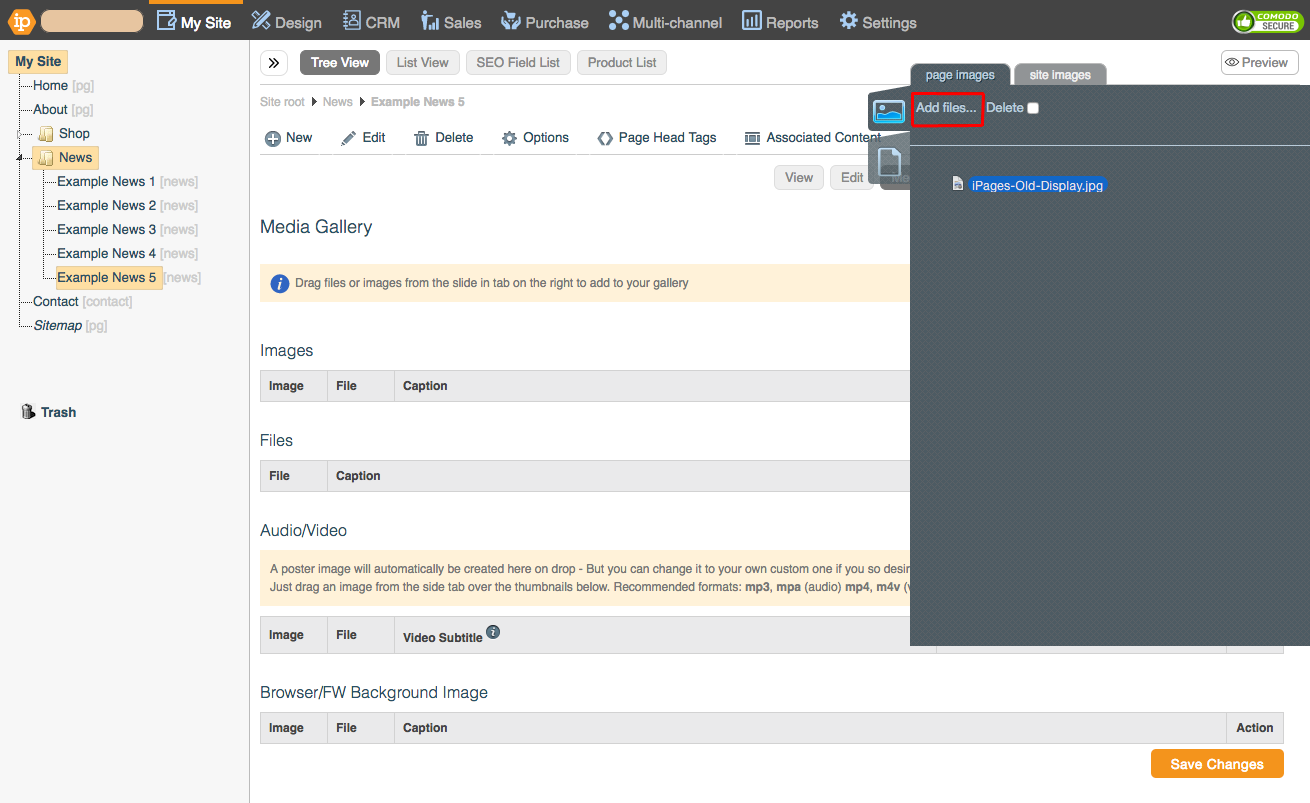
When you see the image in the menu, click Start or Upload.

When the file has uploaded, drag it from the menu to the Image Gallery.
